Ở phần 8 này này mình hướng dẫn về comment, cách tạo comment và bình luận trong wordpress và author ( liệt kê các bài viết thuộc tác giả ).
Comments.php
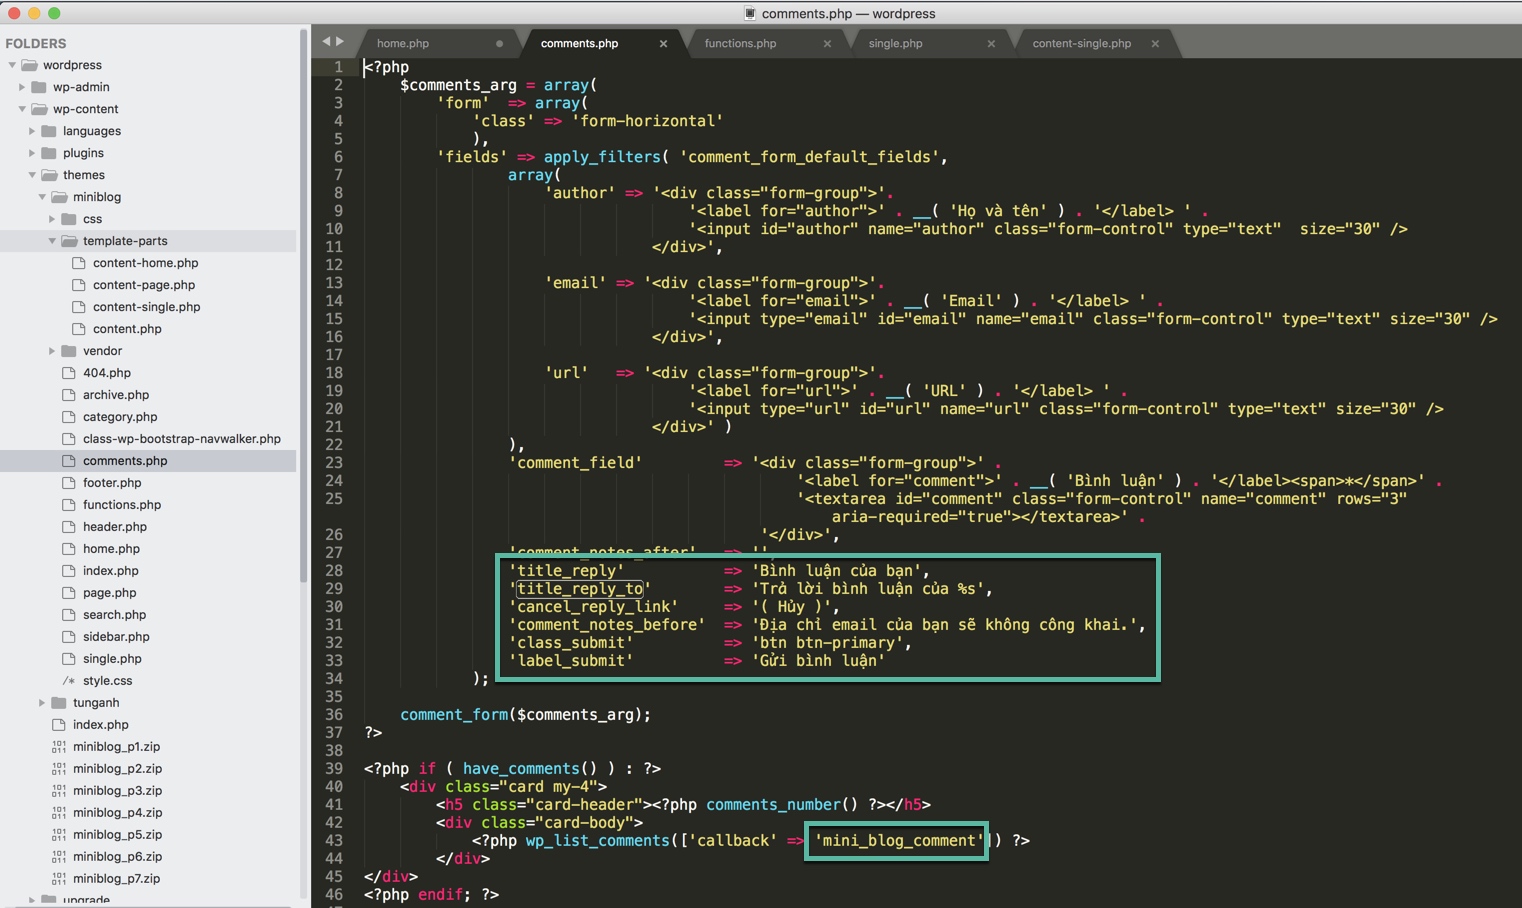
Tạo file comments.php, đây là giao diện phần bình luận dưới bài viết.
- wp-content/themes/miniblog/comments.php
<?php
    $comments_arg = array(
        'form'  => array(
            'class' => 'form-horizontal'
            ),
        'fields' => apply_filters( 'comment_form_default_fields',
                array(
                    'author' => '<div class="form-group">'.
                                    '<label for="author">' . __( 'Họ và tên' ) . '</label> ' .
                                    '<input id="author" name="author" class="form-control" type="text"  size="30" />
                                </div>',

                    'email' => '<div class="form-group">'.
                                    '<label for="email">' . __( 'Email' ) . '</label> ' .
                                    '<input type="email" id="email" name="email" class="form-control" type="text" size="30" />
                                </div>',

                    'url'   => '<div class="form-group">'.
                                    '<label for="url">' . __( 'URL' ) . '</label> ' .
                                    '<input type="url" id="url" name="url" class="form-control" type="text" size="30" />
                                </div>' )
                ),
                'comment_field'         => '<div class="form-group">' .
                                                '<label for="comment">' . __( 'Bình luận' ) . '</label><span>*</span>' .
                                                '<textarea id="comment" class="form-control" name="comment" rows="3" aria-required="true"></textarea>' .
                                            '</div>',
                'comment_notes_after'   => '',
                'title_reply'           => 'Bình luận của bạn',
                'title_reply_to'        => 'Trả lời bình luận của %s',
                'cancel_reply_link'     => '( Hủy )',
                'comment_notes_before'  => 'Địa chỉ email của bạn sẽ không công khai.',
                'class_submit'          => 'btn btn-primary',
                'label_submit'          => 'Gửi bình luận'
            );

    comment_form($comments_arg);
?>

<?php if ( have_comments() ) : ?>
    <div class="card my-4">
        <h5 class="card-header"><?php comments_number() ?></h5>
        <div class="card-body">
            <?php wp_list_comments(['callback' => 'mini_blog_comment']) ?>
        </div>
</div>
<?php endif; ?>
Sử dụng hàm comment_form để gọi khung bình luận. Hàm wp_list_comments để liệt kê các bình luận.

Mở file functions.php
Tạo hàm mini_blog_comment
function mini_blog_comment( $comment, $args, $depth ) {
        $GLOBALS['comment'] = $comment;
        ?>
        <?php if ( $comment->comment_approved == '1' ): ?>
        <li class="media mb-4">
            <?php echo '<img class="d-flex mr-3 rounded-circle" src="'.get_avatar_url($comment).'" style="width: 60px;">' ?>
            <div class="media-body">
                <?php echo  '<h5 class="mt-0 mb-0"><a rel="nofllow" href="'.get_comment_author_url().'">'.get_comment_author().'</a> - <small>'.get_comment_date().' - '.get_comment_time().'</small></h5>' ?>
                <p class="mt-1">
                    <?php comment_text() ?>
                </p>

                <div class="reply">
                    <?php comment_reply_link(array_merge( $args, array('reply_text' => 'Trả lời','depth' => $depth, 'max_depth' => $args['max_depth']))) ?>
                </div>
            </div>
        </li>
        <?php endif;
    }
Hàm mini_blog_comment dùng để tạo layout bình luận theo bootstrap 4
Cuối cùng ta mở file template-parts/content-single.php để chèn comment vào bài viết
<hr>
<div class="mt-3">
    <?php
        if ( comments_open() || get_comments_number() ) {
            comments_template();
        }
    ?>
</div>
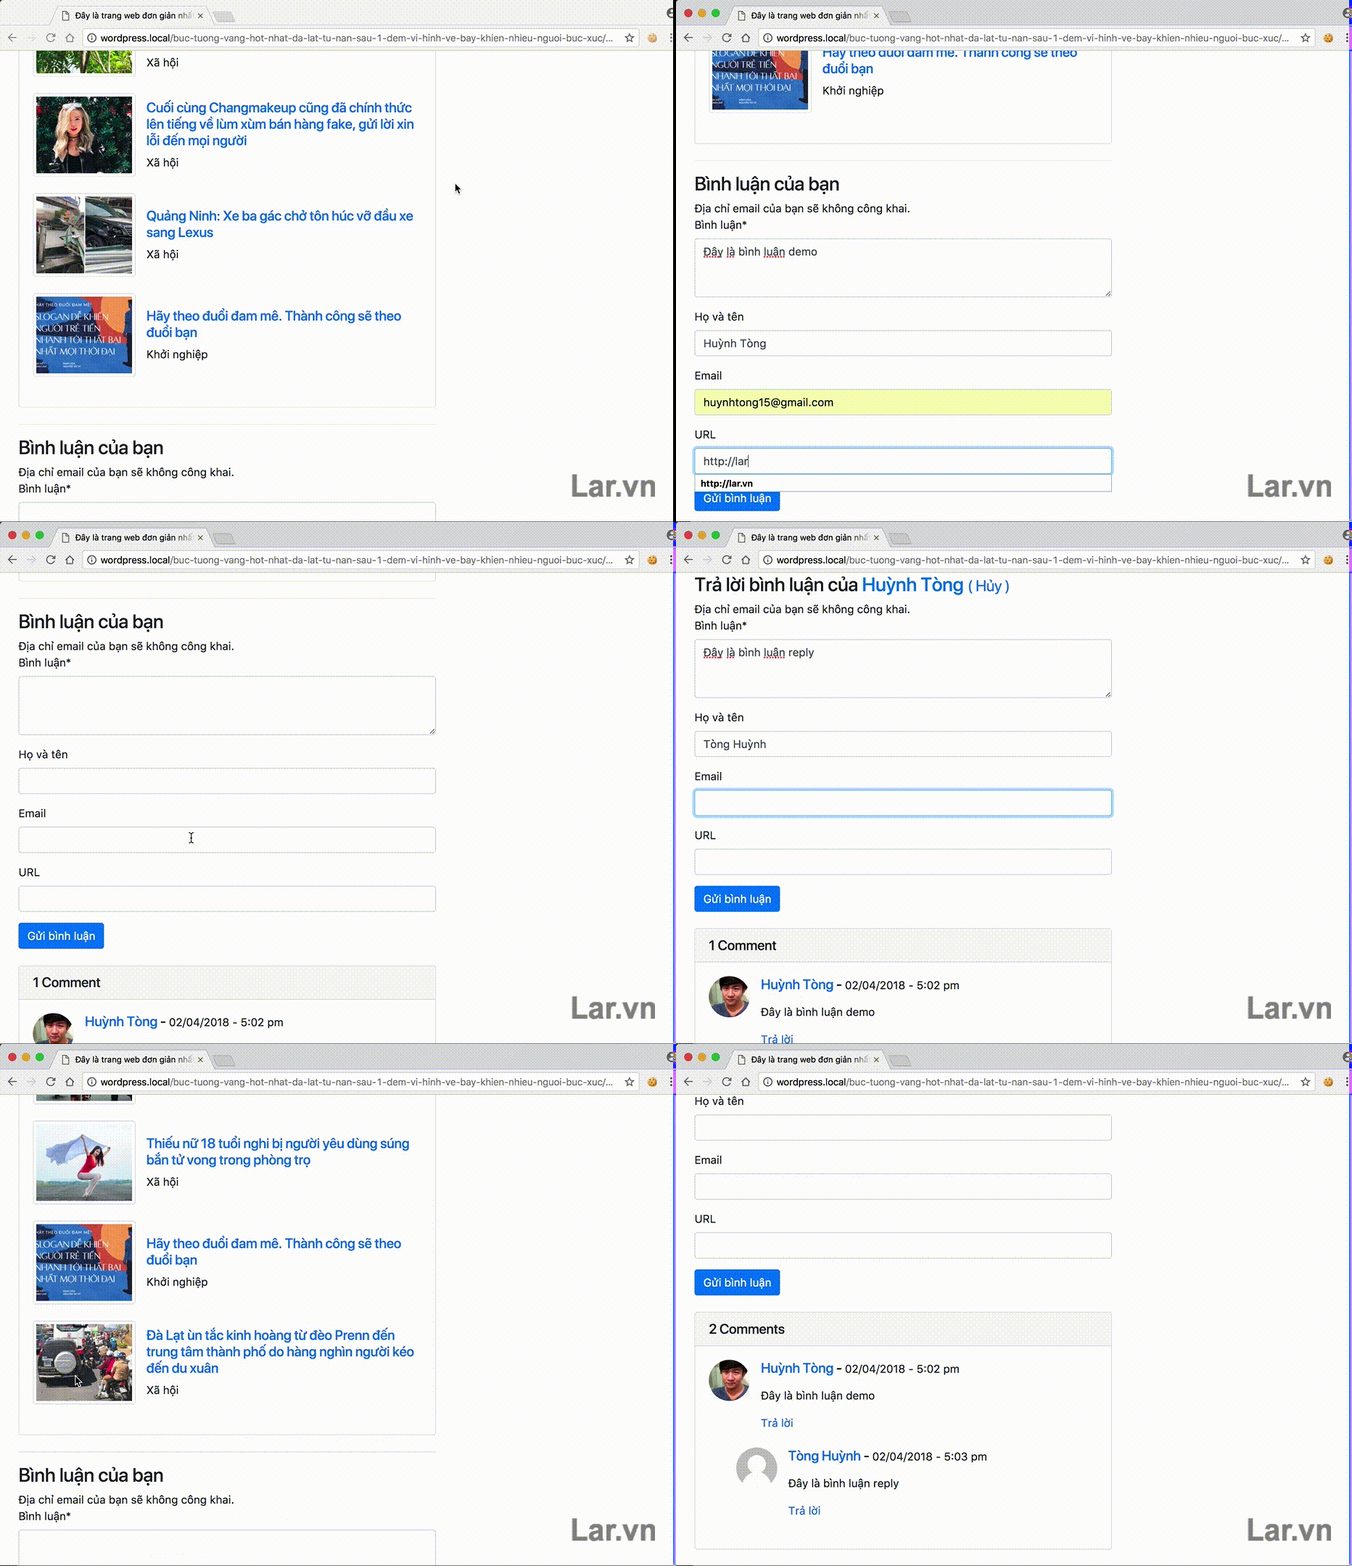
Kết quả ta được như hình sau:

Author.php
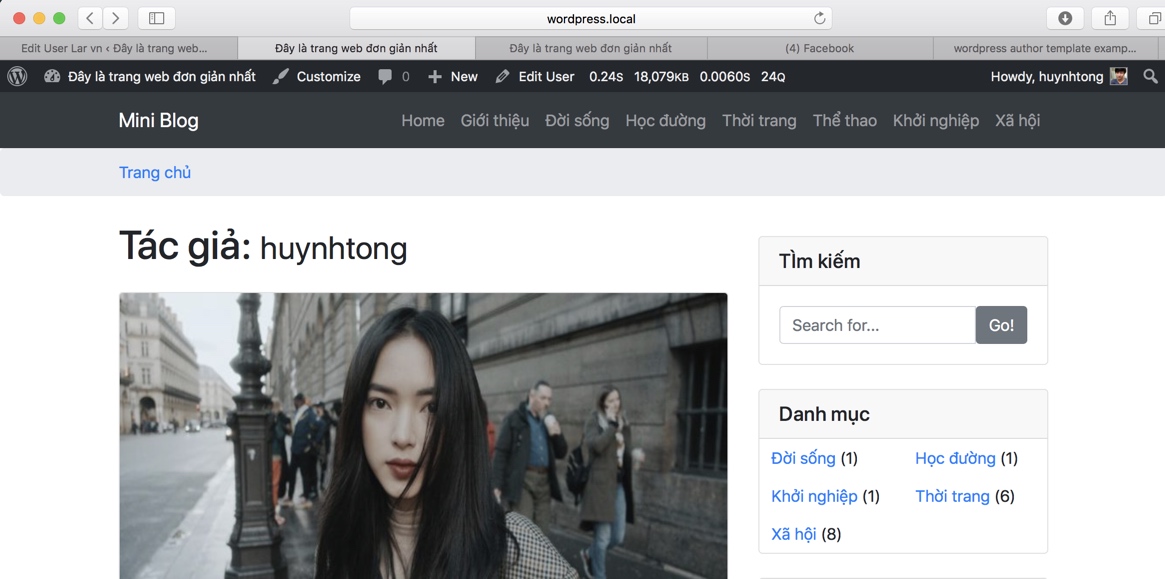
Đây là trang sẽ liệt kê danh sách các bài viết của tác giả
Tạo file author.php
- wp-content/themes/miniblog/author.php
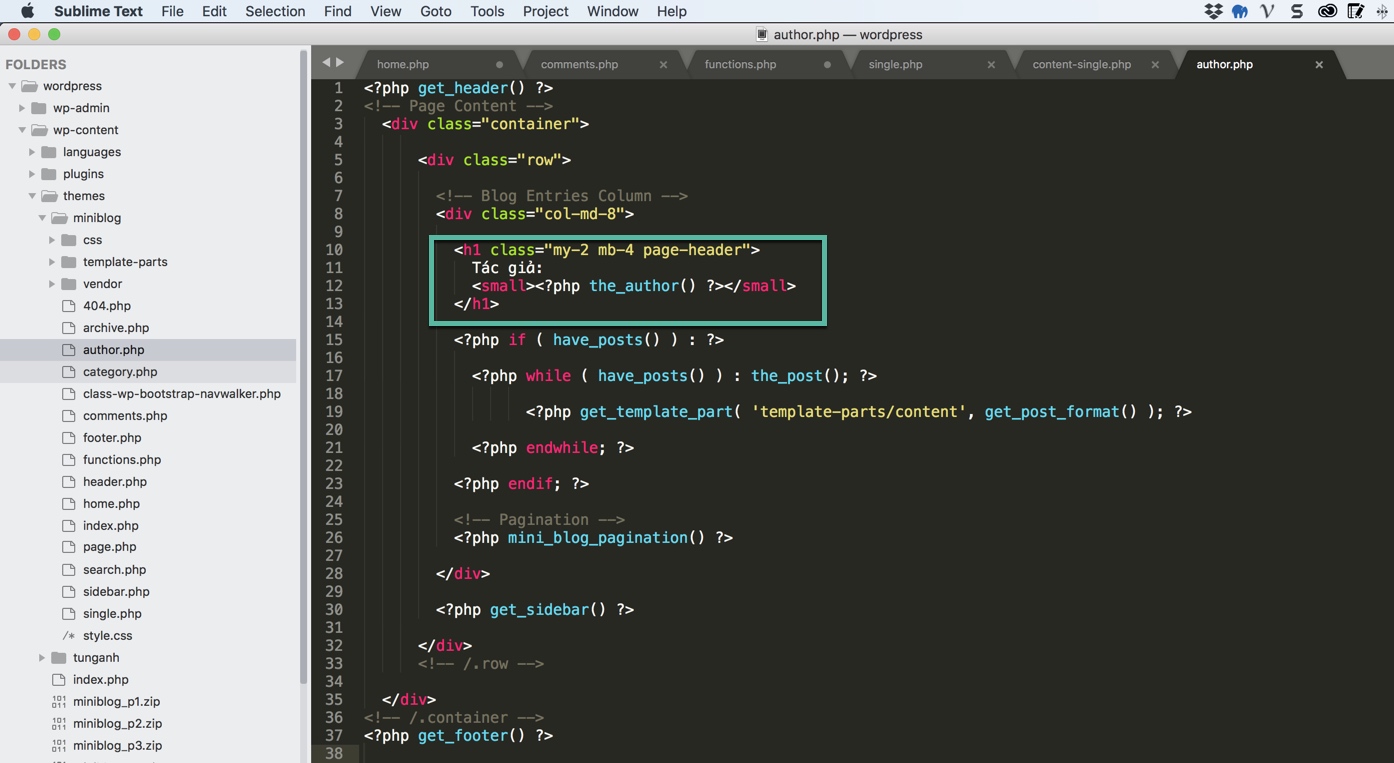
Copy nội dung file category.php vào author.php và thay nội dung trong H1
<h1 class="my-2 mb-4 page-header">
Tác giả:
    <small><?php the_author() ?></small>
</h1>


File code phần 8: miniblog_p8
Cám ơn bạn đã đọc bài viết, chúc bạn một ngày tốt lành.
